Pythagorean Theorem Lego Proof
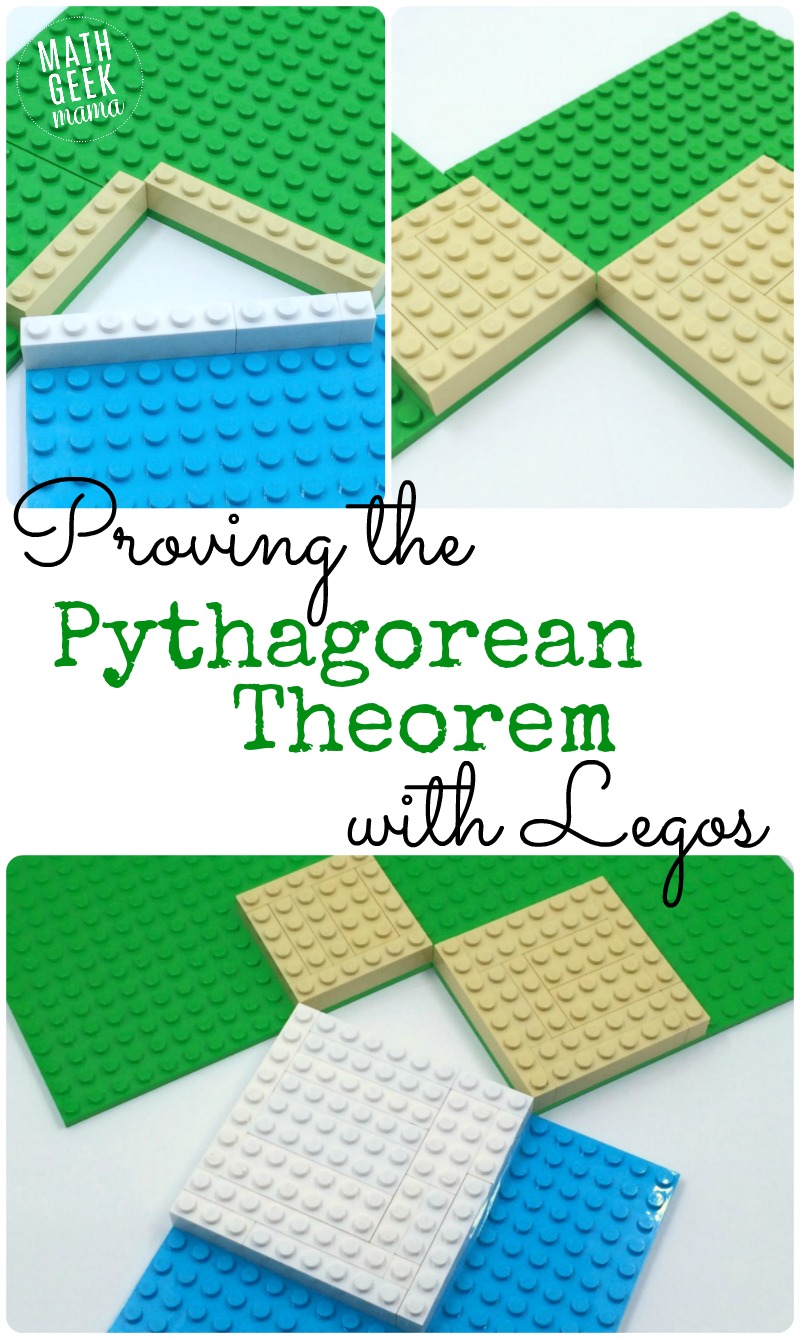
Are you familiar with the Pythagorean Theorem? Even if you know the equation, do you know what it means? What all the letters stand for? Why it even matters? Understanding and then using and applying the Pythagorean theorem is important for students because it is so foundational. It can be applied to all kinds of right triangle problems in trigonometry and geometry and is incredibly useful in the real world to determine measurements and right angles. One problem that I encountered as a high school teacher was that often students would forget what the formula was or (more frequently) what the letters stood for. This Pythaogrean Theorem Lego proof will help students visualize the theorem, remember the different parts and know that it is in fact true.
*Please Note: This post contains affiliate links which help support the work of this site. Read our full disclosure here.*
The pythagorean theorem is foundational to Euclidean geometry, and refers to the area of a right triangle. A, B and C represent the triangle side lengths, with C being the hypotenuse (the longest side, opposite the right angle). The theorem states that given a right triangle with sides of length a, b, and c, then a squared plus b squared is equal to c squared.
Therefore, the theorem is stating that when you square all of the side lengths, the square of the hypotenuse is equal to the sum of the squares of the shorter sides.
This is actually quite surprising when you think about it, because it seems like adding the two shorter sides together would be greater than just the long side. (At least it seems that way to me).
Therefore, I’m going to prove it to you today using Legos. And I hope that you and your students will have fun exploring and enjoying this Pythagorean Theorem Lego Proof together!
To Begin the Pythagorean Theorem Lego Proof:
Remember, we are concerned with a right triangle. Therefore, the first step is to create a right triangle with legos.
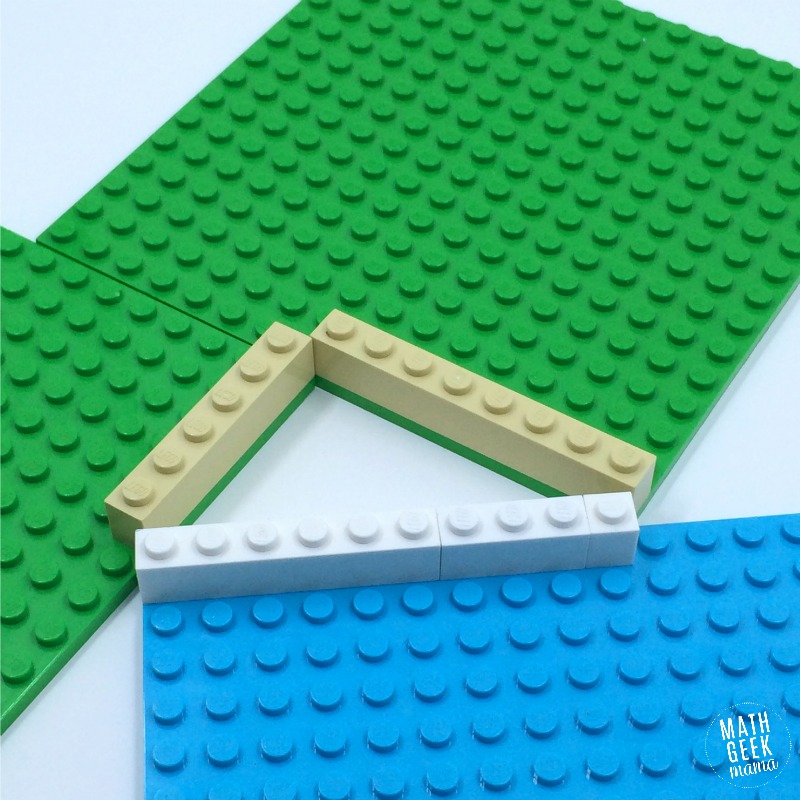
This may not seem possible at first, because you cannot attach legos diagonally on a lego mat. To accomplish this, I actually used three different lego mats, one for each side of my triangle. This accomplished two things:
- I could fit the sides of the triangle together without it being awkward or not quite right.
- I knew that it was in fact a right angle because I could line the two mats up side by side without worrying about if my lines were straight.
When building my triangle, I wanted numbers that would be nice, so I chose 6, 8 and 10 for my side lengths.
After building a right triangle with sides 6, 8 and 10, I was ready to explore the pythagorean theorem.
Love LEGO math? Engage your little ones in engaging, hands on lessons with my collection Learning with LEGO in Grades K-2. See all that’s included right HERE.
My goal (which is important to keep in mind throughout) is to show that if I square each side, then the square of the two shorter sides will be equal to the square of the longest side.
You will notice, therefore, that I used one color of blocks for the two short sides and another color for the hypotenuse. That was intentional, and I recommend you do the same to help make the end result clear.
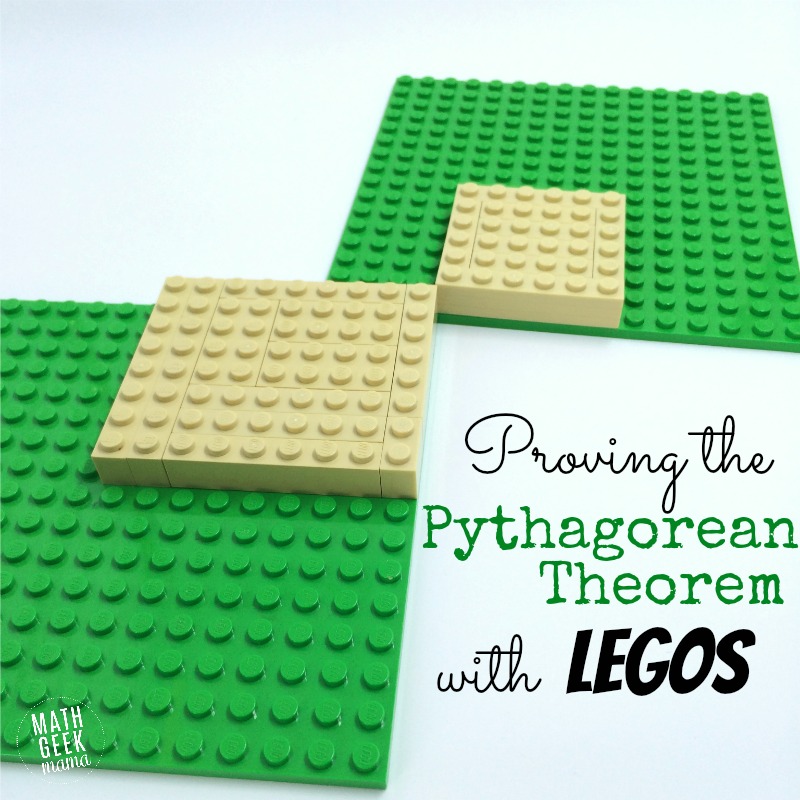
So the first step in this process is to square each side. This means I no longer have one length but a square with each side that length.
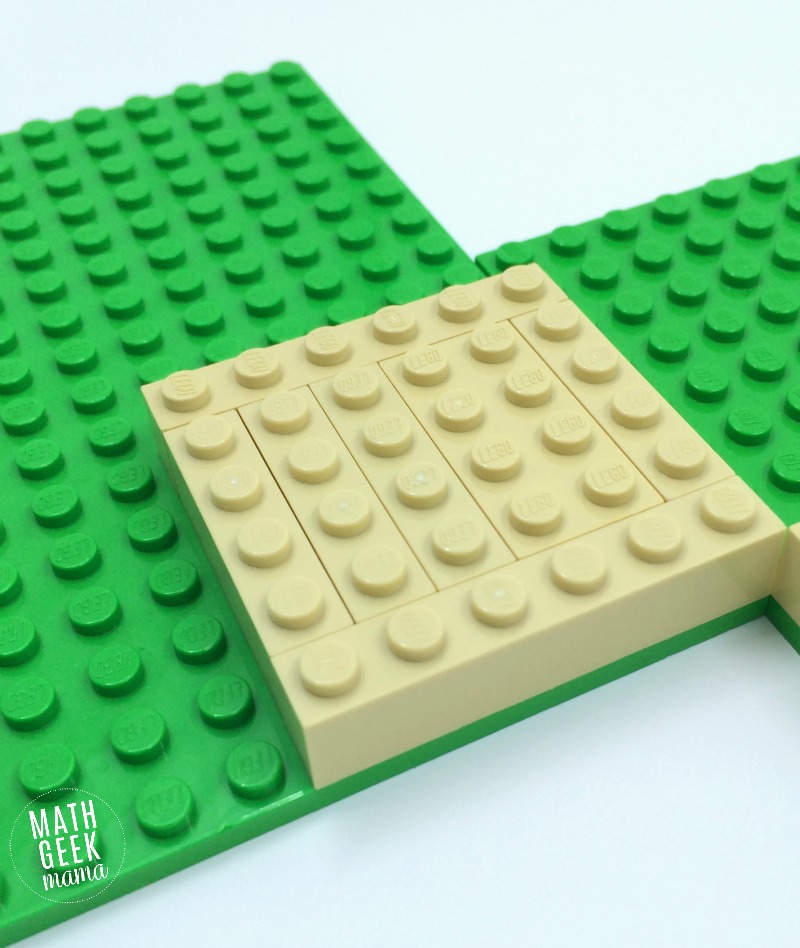
One side became a square of area 36, one side became a square of area 64 and the hypotenuse became a square of area 100. It’s not necessary to calculate the area for the purposes of this proof, however. We will see and prove it without words, numbers or equations. 😉
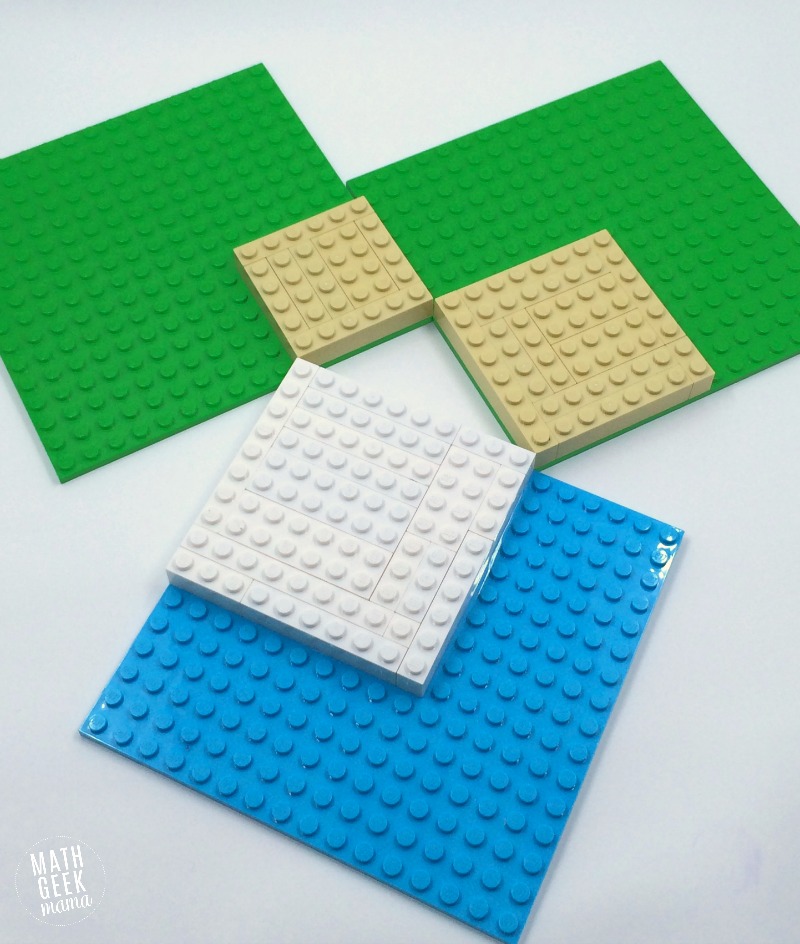
As I looked at these different squares, and tried to arrange them next to each other, it was not immediately apparent that the tan blocks were equal to the white blocks.
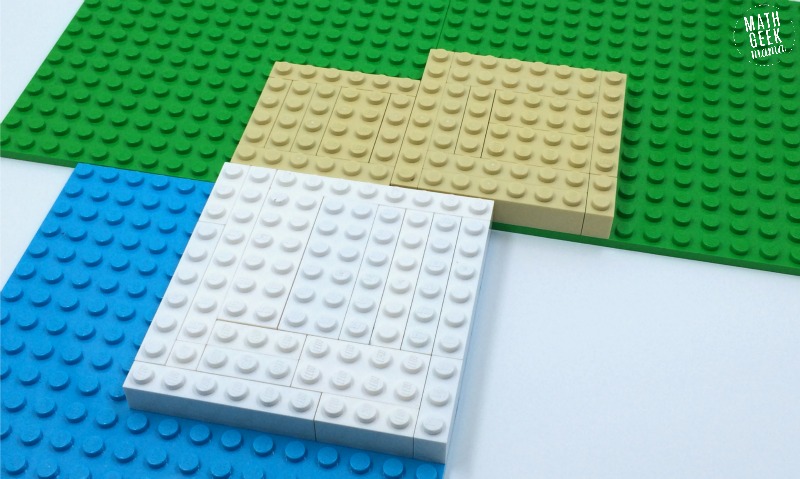
So if our goal is to PROVE that the total of the shorter sides squared (the total tan blocks) is equal to the hypotenuse squared (the total white blocks), what do we do?
Simply place the tan blocks on top of the white blocks. If there is a one-to-one correspondence (i.e. each block matches up with nothing left over and no empty spaces), then they must be equal!
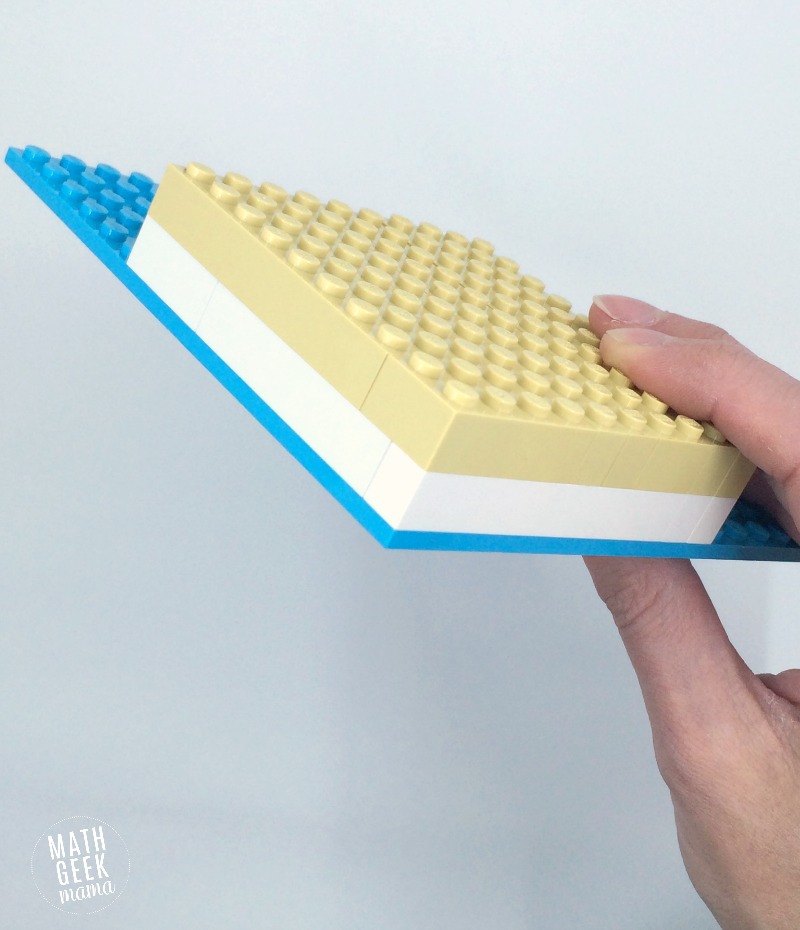
Obviously, there was exactly the same amount, and if you did the addition earlier (36 + 64 = 100) you wouldn’t even need to do this to see that they’re equal.
But this may not be obvious to your students. And even if it is, this still provides a wonderful visual to help them remember the pythagorean theorem.
And as an added bonus, connecting the tan and white blocks turned out the be a bit of a challenge and a fun puzzle to work out because I was using all different dimensions of blocks. So knowing that they were equal, it was a great challenge to actually arrange them on the white square so that they all fit.
Didn’t get enough with this Pythagorean Theorem Lego Proof? Try this list of 100+ different approaches!
Or, explore this and more with the book, Proofs without Words: Exercises in Visual Thinking.
Or if you have younger kids, read the book What’s Your Angle, Pythagoras?, a fun introduction to the Pythagorean Theorem.
And if your kids enjoy math with LEGO, try these fun LEGO math puzzles! Easily adaptable for any age!
Can’t get enough LEGO? My kids adore this fun book:





One Comment
Comments are closed.